
Tesla Model 3 owners looking to refresh their car’s interior have a popular option: replacing the headliner. This upgrade can transform the look and feel of the vehicle’s cabin. The headliner replacement process for a Tesla Model 3 involves removing the old material and installing a new one, often using Alcantara fabric for a luxurious touch.
Many drivers choose to switch to a dark-colored headliner for a sleek, high-end appearance. This change can make the interior feel more spacious and modern. Some Tesla enthusiasts opt to tackle this project themselves, while others prefer professional installation.
The DIY route requires careful handling of interior components and electrical connections. It’s important to follow proper steps when removing and reattaching clips and brackets. For those seeking a simpler solution, aftermarket kits are available that can make the process more straightforward.
Tesla Model 3 Headliner
The Tesla Model 3 headliner is a key interior component that affects both aesthetics and functionality. It covers the roof of the vehicle and houses important electrical components.

Components and Materials
The Model 3 headliner consists of several parts:
- Main fabric covering
- Overhead console
- Map lights
- Electrical harness
- Clips and fasteners
Tesla uses high-quality materials for the headliner. Many Model 3s come with an Alcantara fabric covering, known for its soft feel and durability.
The headliner also includes built-in speakers and wiring for various electrical components. These are integrated seamlessly into the design for a clean look.
Common Reasons for Replacement
Owners may need to replace their Model 3 headliner for several reasons:
- Wear and tear: Over time, the fabric can become stained or damaged.
- Upgrading to a black headliner: Some prefer the sleek look of a darker interior.
- Water damage: Leaks can cause staining or mold growth.
- Electrical issues: Problems with integrated components may require replacement.
- Factory defects: In rare cases, manufacturing flaws might necessitate a new headliner.
Replacing the headliner can refresh the car’s interior and fix any functional problems. It’s a complex job that often requires professional help due to the electrical components involved.
Check out How to Open a Tesla Door?
Preparation for Headliner Removal
Getting ready to remove the Tesla Model 3 headliner takes careful planning. This process involves several steps to access and safely remove components.
Safety Precautions and Tools
Start by putting on safety glasses and work gloves. Gather these tools:
- Plastic trim removal tools
- Phillips head screwdriver
- Flathead screwdriver
- Socket set
- Torque wrench
Turn off the car and disconnect the 12V battery. This prevents electrical shocks. Cover the seats and floor with protective sheets to avoid damage.
Removing the Front Row Components
Begin with the front area. Take out the sun visors on both sides. Remove the screws behind them. Gently pull down the overhead console. Unplug any wires connected to it.
Next, remove the A-pillar trim on both sides. Start at the bottom and work your way up. Be careful not to break the clips. Take out any fasteners holding the headliner at the front.
Removing the Second Row Components
Move to the back seats. Remove the coat hooks and their bezels. Use a flathead screwdriver to pop off the covers. Unscrew the hooks underneath.
Take out the B-pillar trim on both sides. This gives access to more headliner clips. Remove any remaining fasteners along the sides and rear of the headliner.
Lower the headliner slightly. Disconnect any wiring for lights or sensors. With help, carefully remove the headliner through the rear hatch opening.
Check out Tesla Wall Charger Green Light Issue
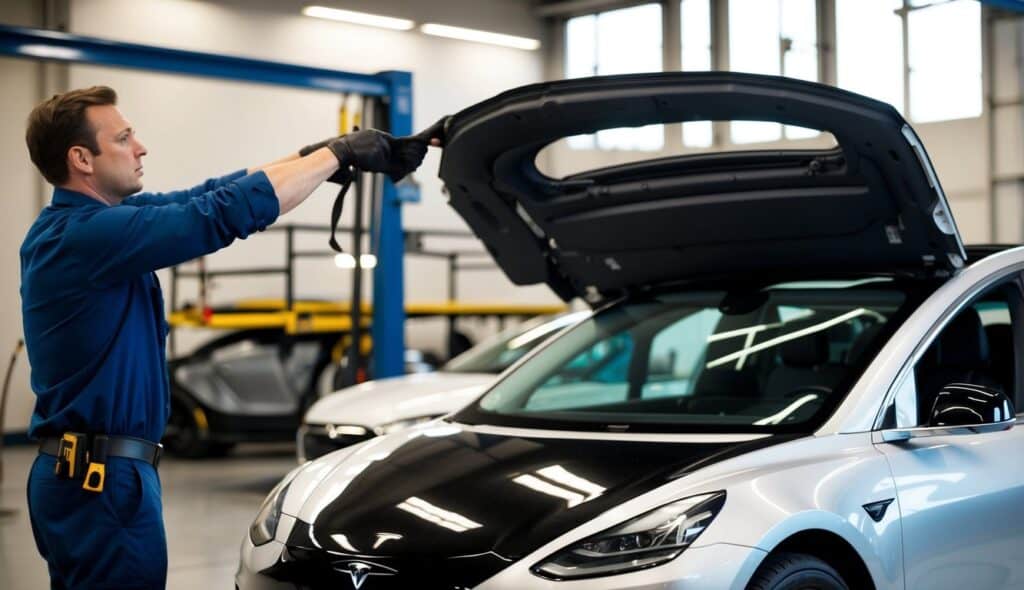
Headliner Removal Process
Removing the headliner in a Tesla Model 3 requires careful handling of clips, connectors, and electrical components. The process involves detaching the headliner from the vehicle roof and managing the electrical harness.
Detaching the Headliner
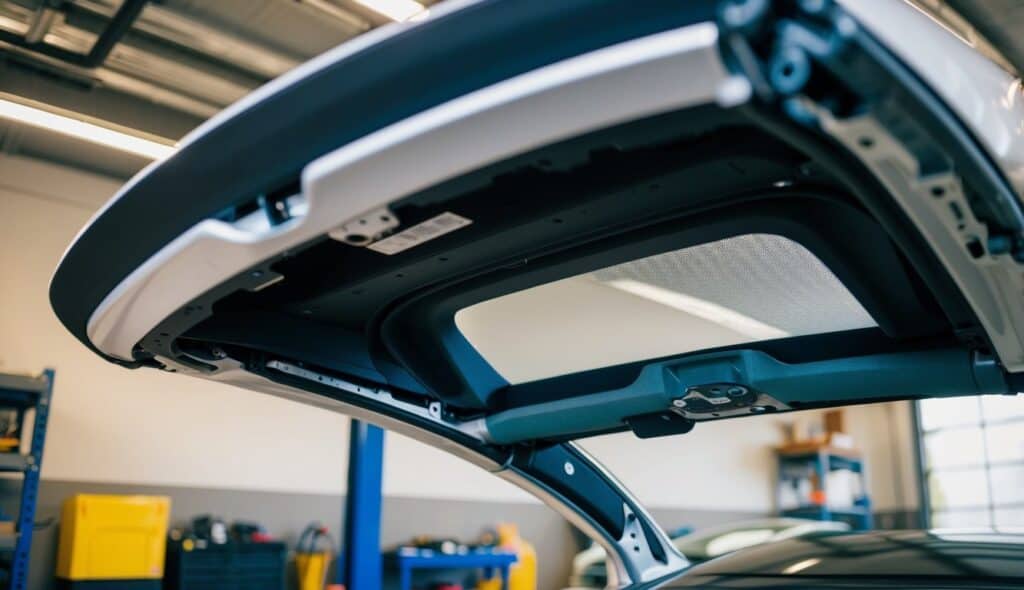
Start by moving both front seats fully back and reclining them. This creates space to work. Open the liftgate for better access. Locate the clips attaching the headliner to the body. There are about 10 clips to release. Work slowly to avoid damaging the headliner or clips.
Remove the rear map lights from the headliner. Take out the screws holding the front map lights. Detach the overhead console by releasing its clips. These steps free up the headliner’s edges.
With help, carefully pull the headliner down through the liftgate opening. The headliner is large and can be awkward to handle. Take care not to bend or crease it during removal.
Handling the Electrical Components
Disconnect the headliner’s electrical harness connector. This is usually near the left A-pillar area. Unclip any brackets holding the harness in place. Gently pull the harness free from the headliner.
Remove the left and right headliner tweeter covers. These are held in place by clips. Disconnect any wiring attached to the tweeters. Take care not to damage the small wires or connectors.
For the rear view mirror area, remove the sun visor bracket cover on the right side. This may have 4 clips holding it in place. Extending the sun visor can give you more room to work. Remove the sun visor fastener to fully free this area.
Check out Does Tesla Need Wheel Alignment?
Installing the New Headliner in Tesla Model 3
Putting in a new headliner for your Tesla Model 3 takes care and attention to detail. The process involves lining up the headliner correctly and hooking up the electrical parts.
Aligning and Securing the Headliner
Start by removing the new headliner from its shipping bag. Carefully lift it into the car through the open liftgate. Position it against the roof, making sure it’s centered.
Line up the edges with the car’s frame. Press firmly to snap the clips into place. These clips hold the headliner tight against the roof.
Work from front to back, securing each section as you go. This keeps the fabric smooth and prevents wrinkles.
Check that all edges are tucked in neatly. Pay extra attention to corners and curves.
Reconnecting Electrical Components
Once the headliner is in place, it’s time to hook up the electrical parts. Find the main electrical harness near the front of the headliner.
Connect this harness to the car’s wiring. Make sure it clicks firmly into place. This powers features like overhead lights and sensors.
Reattach the tweeter covers to the headliner. These house the car’s upper speakers. Snap them into their spots, ensuring a snug fit.
Check all connections before moving on. Loose wires can cause problems later. Test the overhead lights and other functions to make sure everything works.
Check out How Do I Know If My Tesla Needs an Alignment?
Post-Installation Checklist
After replacing the Tesla Model 3 headliner, it’s crucial to verify proper installation and ensure quality and safety. This checklist covers key steps to complete the job correctly.
Verifying Proper Installation
Check all attachment points to make sure the headliner is secure. Inspect the edges for any gaps or misalignment. Test all electrical components, including overhead lights and sensors. Make sure the headliner sits flush against the roof without sagging or bubbling.
Verify that all trim pieces are properly reattached. This includes A-pillar covers, sun visors, and any removed panels. Check that the front and rear map lights function correctly. Ensure the headliner material is smooth and free of wrinkles or creases.
Inspect the headliner around the sunroof opening, if equipped. Look for even gaps and proper fit. Test the sunroof operation to confirm the headliner doesn’t interfere.
Quality and Safety Assurance
Perform a visual inspection of the entire headliner surface. Look for any stains, marks, or damage that may have occurred during installation. Check for proper clearance around airbags and sensors.
Test all overhead controls and buttons. This includes dome lights, microphones, and Autopilot cameras. Ensure no wires are pinched or visible.
Verify that all clips and fasteners are securely in place. Double-check torque specifications for any bolts or screws used. Clean the headliner surface and surrounding areas to remove any fingerprints or dirt.
Conduct a road test to check for any rattles or unusual noises from the headliner area. Make sure the new headliner doesn’t affect the car’s interior acoustics or comfort.
Check out Tesla Model 3 Performance
Additional Considerations
Replacing the headliner in a Tesla Model 3 involves more than just a physical swap. Before starting the project, you must consider financial aspects and service options.
Cost Factors and Budgeting
Headliner replacement costs can vary widely. The price of a new Tesla Model 3 headliner ranges from $500 to $1500, depending on the material and supplier. Labor costs add another $300 to $800 if done by a professional. DIY enthusiasts might save on labor but risk mistakes that could lead to extra expenses.
Some Model 3 owners on Reddit report spending around $1000 for a full headliner replacement. Prices may be higher at Tesla service centers compared to independent shops. It’s smart to get quotes from different places before deciding.
Seeking Professional Service
While some Tesla owners tackle headliner replacement themselves, many choose professional help. Tesla service centers offer expert installation but often at premium prices. Independent auto upholstery shops can be a more budget-friendly option.
When picking a service provider, look for experience with Tesla vehicles. Ask about warranties on parts and labor. Some shops might offer custom materials or colors not available from Tesla.
It’s wise to check reviews and ask for photos of past Model 3 headliner replacements. This helps ensure quality work. Remember that improper installation can lead to issues like loose fitment or electrical problems with overhead lights.
Check out Tesla Model 3 Suspension Replacement
Frequently Asked Questions
Tesla Model 3 headliner replacement involves several key steps and considerations. Many owners have common questions about the process, materials, and tools needed.
How do you remove the headliner from a Tesla Model 3?
Removing the Model 3 headliner requires several steps. First, recline the front seats and open the liftgate. Remove the rear map lights and overhead console. Next, take out the screws holding the front map lights. Release the clips attaching the headliner to the body. Disconnect the electrical harness. With help, carefully remove the headliner through the liftgate opening.
What is the cost range for Tesla Model 3 headliner replacement?
The cost of replacing a Tesla Model 3 headliner varies. Factors include labor rates and material choices. Professional installation typically costs between $500 to $1500. DIY replacement using aftermarket materials may cost $200 to $500 for parts.
Is the headliner in a Tesla Model 3 difficult to replace by oneself?
Replacing the Model 3 headliner is challenging for DIY enthusiasts. It requires careful handling of a large, fragile part. The process involves working in tight spaces and dealing with electrical connections. Most owners prefer professional installation to avoid damage.
What material options are available for replacing a Tesla Model 3 headliner?
Tesla Model 3 owners have several headliner material choices. The standard option is a synthetic suede-like material. Aftermarket options include fabric, vinyl, and genuine suede. Some companies offer custom colors and patterns to match interior preferences.
Can the headliner of a Tesla Model 3 be upgraded to Alcantara?
Yes, the Tesla Model 3 headliner can be upgraded to Alcantara. This premium material offers a luxurious look and feel. Alcantara is more expensive than standard materials. Professional installation is recommended for the best results with this high-end option.
Are there any specialized tools required for Tesla Model 3 headliner installation?
Installing a Tesla Model 3 headliner doesn’t require many specialized tools. Basic hand tools like screwdrivers and trim removal tools are needed. A spray adhesive is used to attach the new material. Having a helper makes the job easier due to the headliner’s size and shape.
Conclusion
Replacing the headliner in a Tesla Model 3 is possible but requires careful consideration. The process can be complex and may involve removing multiple interior components.
Professional installation is recommended for best results. Costs can vary depending on materials and labor. Alcantara is a popular upgrade option that adds a luxurious touch.
Swapping the headliner allows owners to customize their Model 3‘s interior. It can refresh the look of an older vehicle or add personal style. However, it’s important to weigh the benefits against the time and expense involved.
Proper tools and techniques are essential for a quality installation. Damage to other interior parts is a risk if not done correctly. Some owners may prefer to keep the original headliner to maintain the car’s stock appearance.
The decision to replace the headliner ultimately depends on individual preferences and budget. For those seeking a change, it can be a rewarding upgrade that enhances the Model 3’s interior ambiance.

Hi, I’m Marybeth, an electric car enthusiast living in New York in the USA. As the owner of electriccartalks.com, I love sharing my knowledge on EV tips, battery maintenance, and charging solutions. As a proud Tesla owner, I blend my personal experiences with professional insights to offer valuable information to fellow EV enthusiasts. Through my articles, I aim to empower others to make informed decisions about their electric vehicles. Read more